Step By Step Gel Nails at Home
Do-It-Yourself Gel Nails: A Guide for Beginners
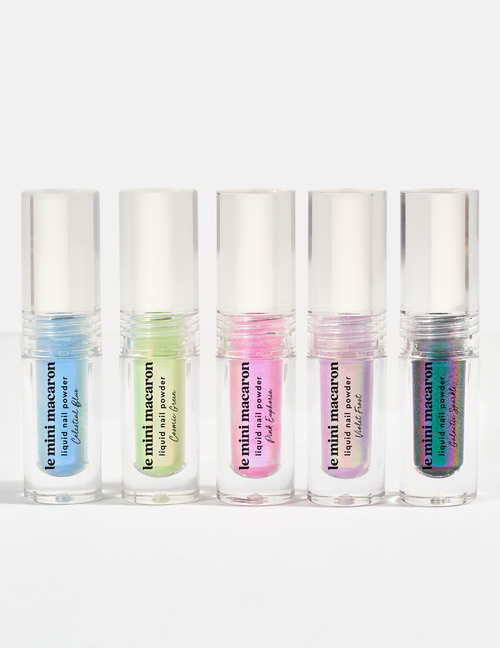
Perfect for those who are always on the go, gel nails offer a long-lasting, flawless manicure. While getting your gel nails done at a salon is the traditional route, it can be costly, and not to mention the upkeep can be time-consuming. A do-it-yourself home mani or pedi can be a cost-effective and more convenient alternative. With the right tools, techniques, and a little patience, you can achieve salon-quality gel nails in the comfort of your own home. With over 90 different gel polish nail colors to choose from, Le Mini Macaron has a color for every mood, every season, every style, and every cherie.
Materials You'll Need for a DIY Gel Manicure
Before you get started, you’ll need to make sure you have all the necessary materials and tools. Le Mini Macaron has everything you need to build a complete manicure set at home. From cleansers to top coats, you can get a salon-quality manicure right in your own home in just about 20 minutes.
Step 1: Prepare Your Nails

Prep your nails, sanitize nail tools, and remove any old gel polish with our cleanser pads. Next, shape your nails with a file. Unsure what shape is best for your hand? We have some tips for you here.
Trim and clean your nails as needed. Use a cuticle pusher to gently push back your cuticles. If necessary, trim excess cuticles with a cuticle trimmer. Our cuticle care bundle has everything you need to get immaculate results.
Next, you need to clean the dust and oils off your nails. Wiping away dust and oils is the #1 step for long-lasting, chip-free gel manicures. Gel polish needs a clean, dehydrated surface for the best, long-lasting results. Our Nail Cleanser Prep Pads will get you the clean nails base you need for a perfect application. After you’ve pushed back, polished, and filed, cleaned your nails, do not, we repeat DO NOT, touch ANYTHING (not your face, your hair, your phone, nothing!).
Unlock the secrets of celebrity nail prep for gel polish in this Byrdie article!
Step 2: Apply the Gel Polish

Gel polish has a much thicker texture than regular nail polish, so it’s important to shake gel polish before each use. This will help even out the texture for an easier, more even application.
Apply an ultra-thin layer of your chosen gel nail color. Our 3-in-1 gel formula combines base coat, color, and top coat all in 1 bottle, so you don’t even need to start with a separate base coat. Make sure the polish is even and covers the entire nail surface. Be careful not to touch your skin or cuticles. If you accidentally get gel on your skin, use the opposite end of the cuticle stick or our Le Round brush dipped in acetone to clean any polish off your cuticles before you cure.
Pro tip: Due to its texture, it’s normal for gel polish sometimes to retract on the nail bed. To help avoid this, don’t let the gel polish get too much air. A good rule to follow: If the brush is not on the nail, the nail should be in the lamp. Remember to paint your nails one by one (with Le Maxi lamp paint two by two) and cure as you go. Also, painting your entire nail, all the way to the tip, and capping the edge, will help with retraction.
Step 3: Cure Under the LED Lamp

Place your nails under LED lamp and cure for at least 30 seconds if using the Le Mini lamp or 60 seconds if using the Le Maxi lamp. If you prefer a deeper color, apply a second coat of gel nail color and cure it under the lamp.
Step 4: Apply the Top Coat
While a top coat is not necessary if using Le Mini Macaron gel polishes, who doesn’t want a little extra shine? Our best-selling Gel Shine Top Coat gives you three times the shine and lasting power. Apply a thin layer of the gel top coat and cure for 30 seconds to seal and protect your nails. Remember to ensure the edges are properly coated to prevent chipping.
Step 5: Clean and Finish

Use a small brush or cotton swab dipped in remover to clean up any polish that may have gotten on your skin or cuticles. This step gives your milky nails a clean and professional look. Apply cuticle oil or moisturizer to nourish your cuticles and keep your nails hydrated.
Bonus Tip!

Our most important tip is practice & patience. Gel polish like most new things has a learning curve. The more you do it, the better you’ll get. You may even learn more tips and tricks along the way. Give yourself time, practice, and patience to get it just right and you’ll be painting perfect gel manis in no time!
Step-by-Step Guide To Gel Application with Our LED Mini Lamp:
TLDR? Here's a step-by-step guide for a salon-quality gel manicure at home.
1. File the edge and surface of your nail. Use our Nail Cleanser Prep Pads or our Nail Cleanser ‘Le Clean’ and wipe away the dust and oils.
2. Apply a VERY thin (barely there) layer of gel polish.
3. Cure in the LED lamp for 30 seconds.
4. Apply a second layer of gel polish, and cure again.
5. Do this process for each one of your nails and that's it - you're done!


